2. To open camera settings (if you are in Perspective, or any other type of view) - Open the Attribute Editor, then click - VIEW> Select camera. The settings will open for that particular camera. ( other of the ways to select a camera is to open Outliner (Window>Outliner) and click the camera).
3. Camera Atributes near CLIP PLANE - 0.100 - closest, FAR Clip Plane - FURTHEREST camera view! How close or further camera can go with seeing your model.
4. Environment (in camera settings) - you can change the BACKGROUND of the rendered image, as well use/create an image plane.
5. Display Options: all about the Film Gate, Gate Maks, Resolution Gate.
in Overscan - you can change the size of Resolution Gate (you see in the view). Default is 1.300, but making it 2.500 for example would show more "fit" resolution in the screen, especially if you have bigger IMAGE SIZE values in your render settings.
6. Camera and Angle of View
One of the most important settings for the camera is Angle of View (which is connected directly with Focal Lenght).
Smaller value of Angle of View (lets say 30) - make model look more orthographic, bigger value (lets say 100) - look more 3D and distorted.
7. RENDERING AMBIENT OCCLUSION IN SCENE

 To render AO.
Create a NEW Render layer.
Assign geometry to that layer.
Create a Surface shader.
Double click Out Color choose Mental Ray Render Nodes - Textures) - mib_ambient_occlusion.
Settings can differ for different scenes but here are some you can tweak.
Rays 528 (the more the better, but adds to render time)
Bright - White color - to whiten the whites - use 2 in V.
Black color - to darken the darks use "-1" in V.
Spread - 2 (spreads the shadow effect)
Max Distance - 40 (or 20 for lighter effect).
Render.
8. RENDERING LIGHT MAP for gaming
First combine all geometry that has ONE UV MAP.
Make sure you have Mental Ray loaded in Maya.
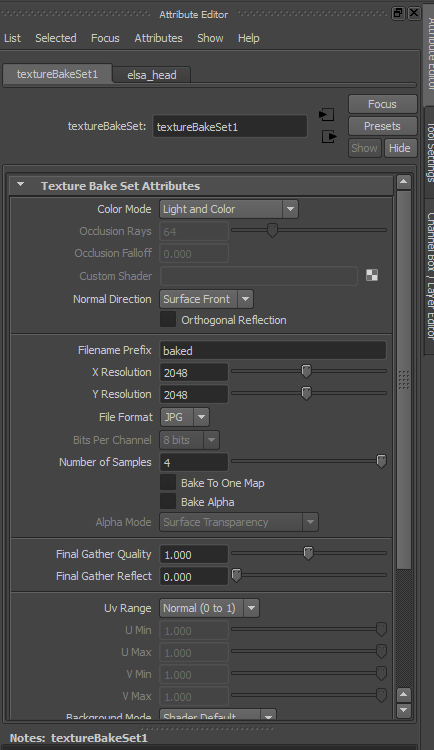
Select geometry >> right click on it >> chose Baking >>Assign New bake set (mental ray) >> Texture bake Set
It appears in OUTLINER (if its not selected, select it). in the Attribute Editor choose:
Light and Color
X resolution 1024 or 2048
Y resolution 1024 or 2048
JPG or TGA or BMP
Number of Samples 4
---------------------------------------------------
Now from the Rendering module, "Lighting/Shading" menu select the "Batch Bake (mental ray)" option.

Bake to Texture
Bake Optimatization - Single Object / or Multiple (if your GEO is NOT combined)
Bake Shadows ON
Use bake set override
Color Mode - Only Light / or Occlusion
Occlusion Rays 150
baked
1024 or 2048
TGA / JPG or BMP
number of samples 4
Fill texture seams 3.000
Convert and Close
The MAPS appear in your project folder / renderData/mentalray /LightMap
No comments:
Post a Comment